So maybe you have tried our simple elderflower champagne recipe and fancy something a little more challenging, or you are thinking about dipping a finger into the world of home brewing? If so then this could be the recipe for you. Sometimes home brewing is seen as eccentric uncles with beards and leather elbow patches on tweed jackets producing lethally intoxicating brews from obscure ingredients using strange and complicated formulas. You can grow a beard if you want but it isn’t strictly necessary, the tweed jackets are optional, and the formulas, well they soon become interesting but, on the whole aren’t required to actually brew most hedgerow wines.
So, to Elderflower Champagne (‘sparkling wine’ if anyone from the Champagne region of France is checking!) the brewer’s way. This will require a modicum of investment in equipment, some £30 will get you 2 x 32 litre brewing buckets with airlocks, a siphon kit, and a long plastic spoon, all the kit you need which should last for many years. Consumables – sugar, 800g and 3 lemons for every 5l of champagne you intend making, and a sachet of white wine or champagne yeast for every 25litres.
For the bottling you are going to need enough champagne bottles (or prosecco), not wine bottles or swing top beer bottles, these will explode and create a nuclear chain reaction of most awful and messy consequences, for your brew (standard bottles are 750ml, so around 6 per 5litres or gallon). Champagne bottles are designed to take extreme pressures, up to 6 atmospheres, the same as in a double decker bus tyre, twice that of ordinary carbonated beer bottles, and way more than a non fizzy wine bottle. Plastic bottles are certainly strong enough (stronger in fact), but they will allow gas transfer through the walls and cap so that the wine goes off and looses its fizz in 6 months – and champagne bottles have a little more style. Where to get champagne bottles? You can buy them online, or talk to your local restaurant or pub, any friends having a wedding or local wedding venues, or save them up from special occasions and have a word with friends and family, the bottles will soon start rolling in.
Keeping the contents inside – corks and cages, you will need sufficient for the bottles. Cork corks require much effort to get them in, and can’t be reused. I use plastic corks, these can be put in by hand and can be reused many, many, many, times (as long as you watch where they land when opening). The cages are simple affairs that sit over the cork with wires that fit under the lip of the bottle. I make a lot of champagne and so like tools that make my life easier, however some are definitely superfluous. You can buy a special tool for tightening the wires of the cage, but even the websites selling these admit that any thin rod-shaped object will do the job, think pencil, knitting needle, Phillips screwdriver (flat head screwdrivers don’t work as the blade is flared), or chopstick will do the job.
Collect sufficient heads of elderflowers and give them a good shake to remove as many of the bugs as possible (any left will be strained out later). The stems are quite bitter so tear the flowers off so that only short sections of stem remain. Fill your brewing bucket with as much warm water as you plan to make champagne. Put the flower heads into the water.
Add around 800g of sugar per gallon/5 litres, any sugar will do, but caster sugar is cheapest. Stir thoroughly to dissolve the sugar in the warm water. With your long handled spoon you should be able to feel any undissolved sugar on the bottom of the bin. You don’t want any undissolved and uneaten sugar transferring to the bottling stage as this will generate unexpected and unwelcome excess gas.
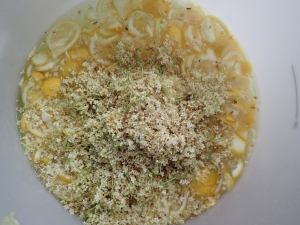
The lemons – traditionally only the zest (hard skin but not the bitter inner layer of pith) and juice is used. However, I make a lot of elderflower champagne and my knuckles can’t cope with zesting – this requires grating the skin from the lemon, a less than helpfully shaped object – and juicing dozens of lemons. I tested slicing the lemons and discovered that side by side you couldn’t taste the difference between zested and juiced, and thinly sliced lemon champagne. so I thinly slice the lemons, 3 per gallon/5 litres (actually I put them in a domestic food slicer/dicer/chopper which does the job very quickly). Add the sliced lemons to the brew.
Finally take the sachet of yeast and to be on the safe side empty the contents into a cup full of warm water and leave for 5 minutes. This will rehydrate the yeast and get it going before adding it to the main brew.
That’s the ingredients in, now you need to allow air to pass in and out, but not any fruit flies in. If you have bought a brewing bin with a hole and a bubble trap that is easy. Put the empty trap into place with its little cap on, or if it hasn’t got a cap, put some cotton wool in the top. Leave this to ferment.
After a couple of days open up the bin – it should all be frothing nicely. Scoop off the bulk of the
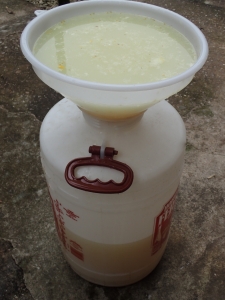
solids and dispose of them. Arrange a method for straining the remainder of the contents into another bin. I happen to have a spare narrow necked bin that I can put a large funnel into. You might need another pair of hands to hold a mesh bag or a strainer. Pour the liquid through the strainer into your other bin or another suitable container. This liquid should now be free of solids, but it won’t be clear as it will contain sediment. If it isn’t already, get the liquid into a brewing bin that you can fit a bubble trap too, and put enough water into the trap so it can bubble without pushing water out. Put the lid on the bin so it is sealed, and you should quickly see and hear the bubble trap allowing the gas to escape. You are now witnessing the yeast (a fungi) eating the sugar and producing alcohol and carbon dioxide – which is the gas you see escaping. We stop air from getting in as the oxygen would cause the alcohol to oxidise (glass of wine left open overnight taste) and the carbon dioxide slowly dilutes the air until there is none left inside.
The next stage is critical, and where folks that say to me they had bottles explode go wrong. You need to observe the bubble trap every few days to see how much activity there is. If you watch for a few minutes and you can still see bubbles escaping then it is still fermenting too much. After 4 weeks or so (depending on temperature, how much sugar you put in, and many other factors) the bubbles should pretty well cease – none in 2 minutes would be a good guide. Place your clean champagne bottles on the floor (preferably in a waterproof box/washing up bowl). Carefully put your bin full of proto-champagne on the kitchen worktop. At this point gather your cleaned champagne/prosecco bottles, sufficient plastic corks and cages, a piece of flexible pipe, a teaspoon
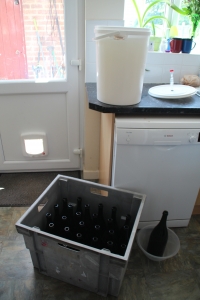
and a bag of sugar. Put a teaspoon of sugar into each bottle ( a small funnel or rolled paper is useful here). By the time you have done that the sediment should have settled in your bin.Take the top off the bin and marvel at the wonderfully smelling pale green liquid. Get a small cup and scoop some out to sample. It will be flat at this stage but the flavour will be pretty close to the final and put the tube/siphon into the liquid and hold it there. Take the other end down to the top of the bottles and suck on the end until the fluid siphons freely. Importantly only fill the bottles to between 5 and 7cm from the top. If you overfill one then tip a little out – add to the next bottle or into a glass for a celebration later. The fuller they are the more pressure will build up when the corks are in. Keep filling bottles until the tube starts to suck up sediment from the bottom. At this point a careful hand can lean the bin over to get a bit more out, probably a bit cloudy, but it will taste as good – maybe bottles for home consumption rather than sharing?
You should now have a small squad of filled champagne bottles. Press the plastic corks in by hand, 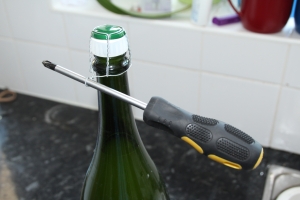 or if you find that hard, put the cork in the neck of the bottle then hold a piece of wood on top of that and tap it with a hammer increasing the force until the cork are sat flush to the top of the bottle. This is scary at first, but the bottles are more than strong enough to stand a few light taps. With the corks firmly in place, put the cages over the tops. Wind the wires tight, by using a narrow rod like a Philips screwdriver or a chopstick through the loop, making sure the wires sit under the lip at the top of the bottle. 3 or 4 twists should do it. If you want to be very fancy you can add labels and foils but these aren’t going to improve the flavour!
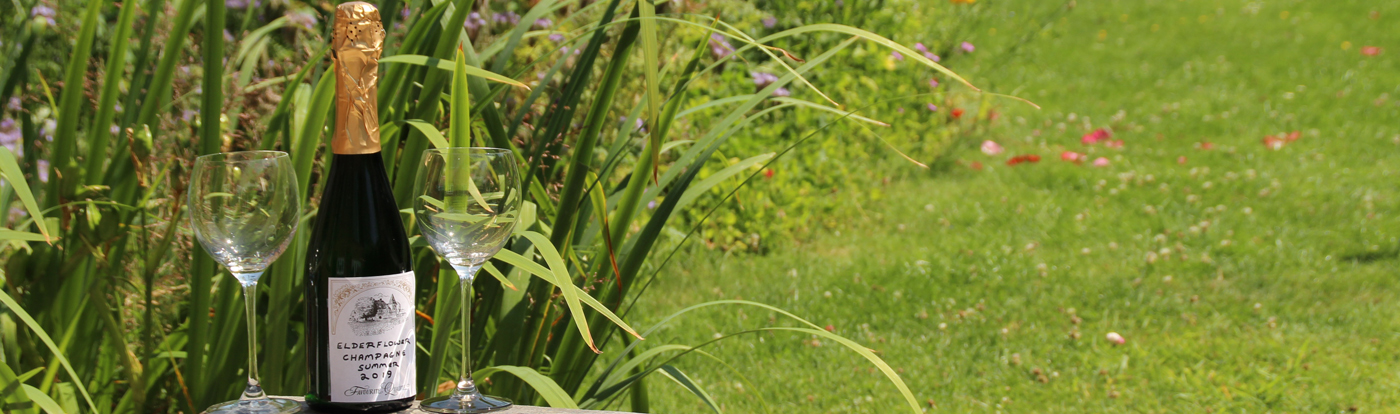
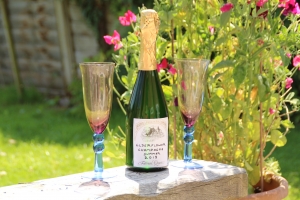
Wait at least 2 weeks and voila, you have your very own Elderflower Champagne. Brewed this way and stored in the bottles it will last a number of years, I have some 4 years old, however they are best drunk in 1 to 2 years. So now you can make your own champagne for an initial outlay of around £30, and assuming you get the bottles for free about 70p per bottle, going down to nearer 40p next time around if you reuse the corks and cages.
Cheers!
Leave a Reply